8 - RADIUS Server

This section configures your Primary Radius client on the Mikrotik to communicate with the WISP.online RADIUS servers.

  1. Click Radius (left) and click (+) symbol to add a radius server.
  2. Under General tab, select Hotspot for Service (you may select PPP, for PPPoE service)
  3. Address of Dedicated Radius: xx.xx.xx.xx (will be given to you)
    Secret field: Click here to securely access the RADIUS shared Secret
  4. Auth port: 1812
    Acct port: 1813
    Timeout: 5000ms
  5. Realm: yourdomain.com (e.g. wisp.online)
    Src. Address: 0.0.0.0

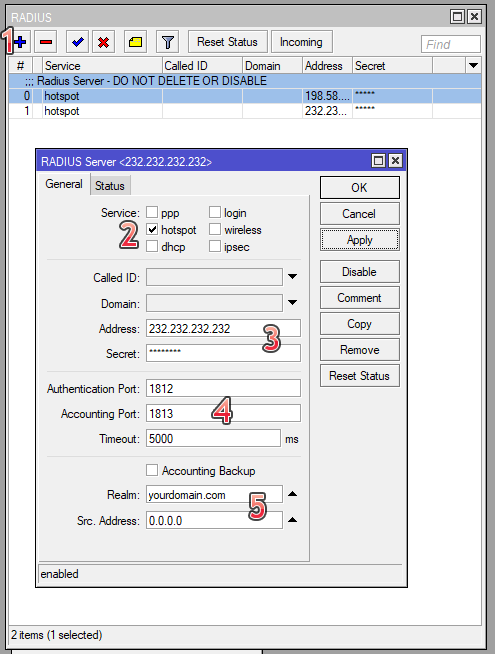
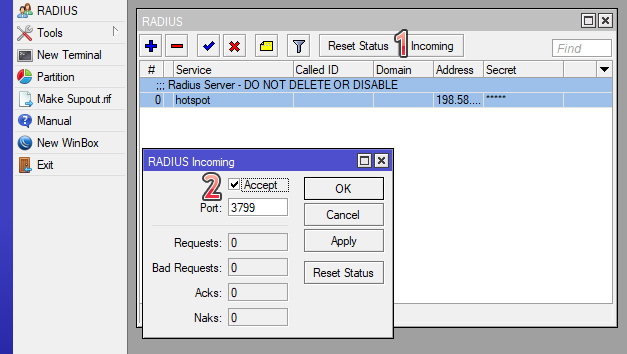
This section configure your RADIUS Incoming Disconnect receiver on port 3799.

  1. Click Incoming
  2. Check Accept on port 3799
  • 0 Users Found This Useful

Was this answer helpful?

Related Articles

1 - Setup Hotspot

To setup your Hotspot, go to (1) IP > (2) Hotspot > (3) Servers > (4) Hotspot Setup...

2 - Server Profile

Go to IP > Hotspot > Server Profiles tab.Edit the server profile created in the last step...

3 - User Profiles

Go to IP > Hotspot > User Profiles Double-click the default user profile If the...

4 - IP Binding (Optional)

Go to IP > Hotspot > IP Bindings. IP-Binding allows to setup static One-to-One NAT...

5 - Walled Garden IP List

Go to IP > Hotspot > Walled Garden IP List tab. This section configures the Mikrotik to...

Powered by WHMCompleteSolution